Big Air Kitesurfing — How to Send It Higher and Land Safely
Big Air kitesurfing is one of the most addictive feelings in the sport. The moment your edge releases, the kite catches, the water drops away and everything goes quiet for a second, you understand why riders spend years chasing height.
But going higher is not just about pulling harder on the bar or riding in stronger wind. Real Big Air progression comes from better timing, cleaner edging, smarter kite control and safer landings. The riders who jump high consistently are rarely the ones who simply send it with the most aggression. They are the riders who know exactly when to load, when to release, where the kite should be, how to manage power in the air and how to prepare the landing before they touch down.
This guide breaks down how to jump higher in kitesurfing without turning every session into a crash reel. It covers the full Big Air process: conditions, setup, takeoff, kite movement, body position, landing technique, common mistakes, safety decisions and the progression path from controlled boosts to loops and advanced tricks.
Whether you are trying to improve your WOO score, prepare for stronger wind, or simply make your jumps cleaner and safer, the goal is the same:
Go higher with more control. Land softer. Progress longer.
What Is Big Air Kitesurfing?
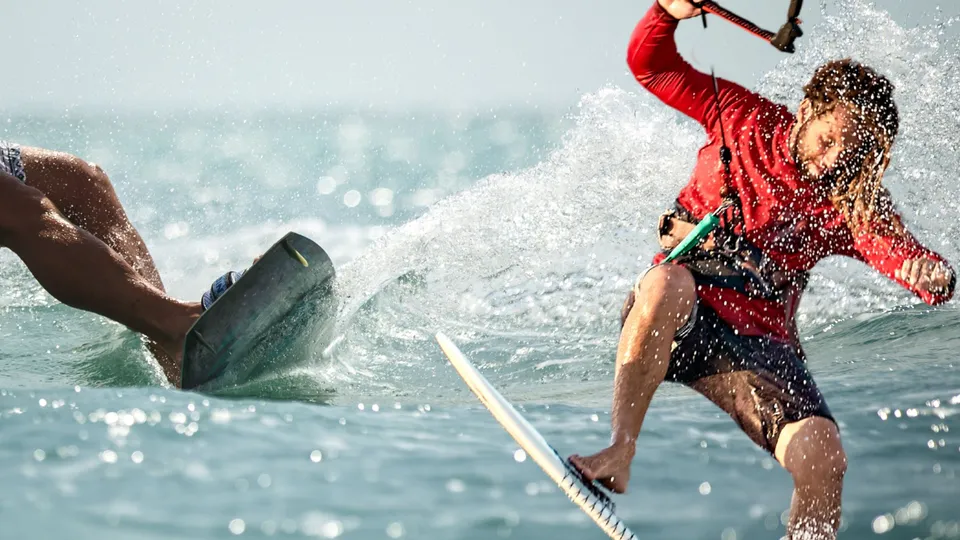
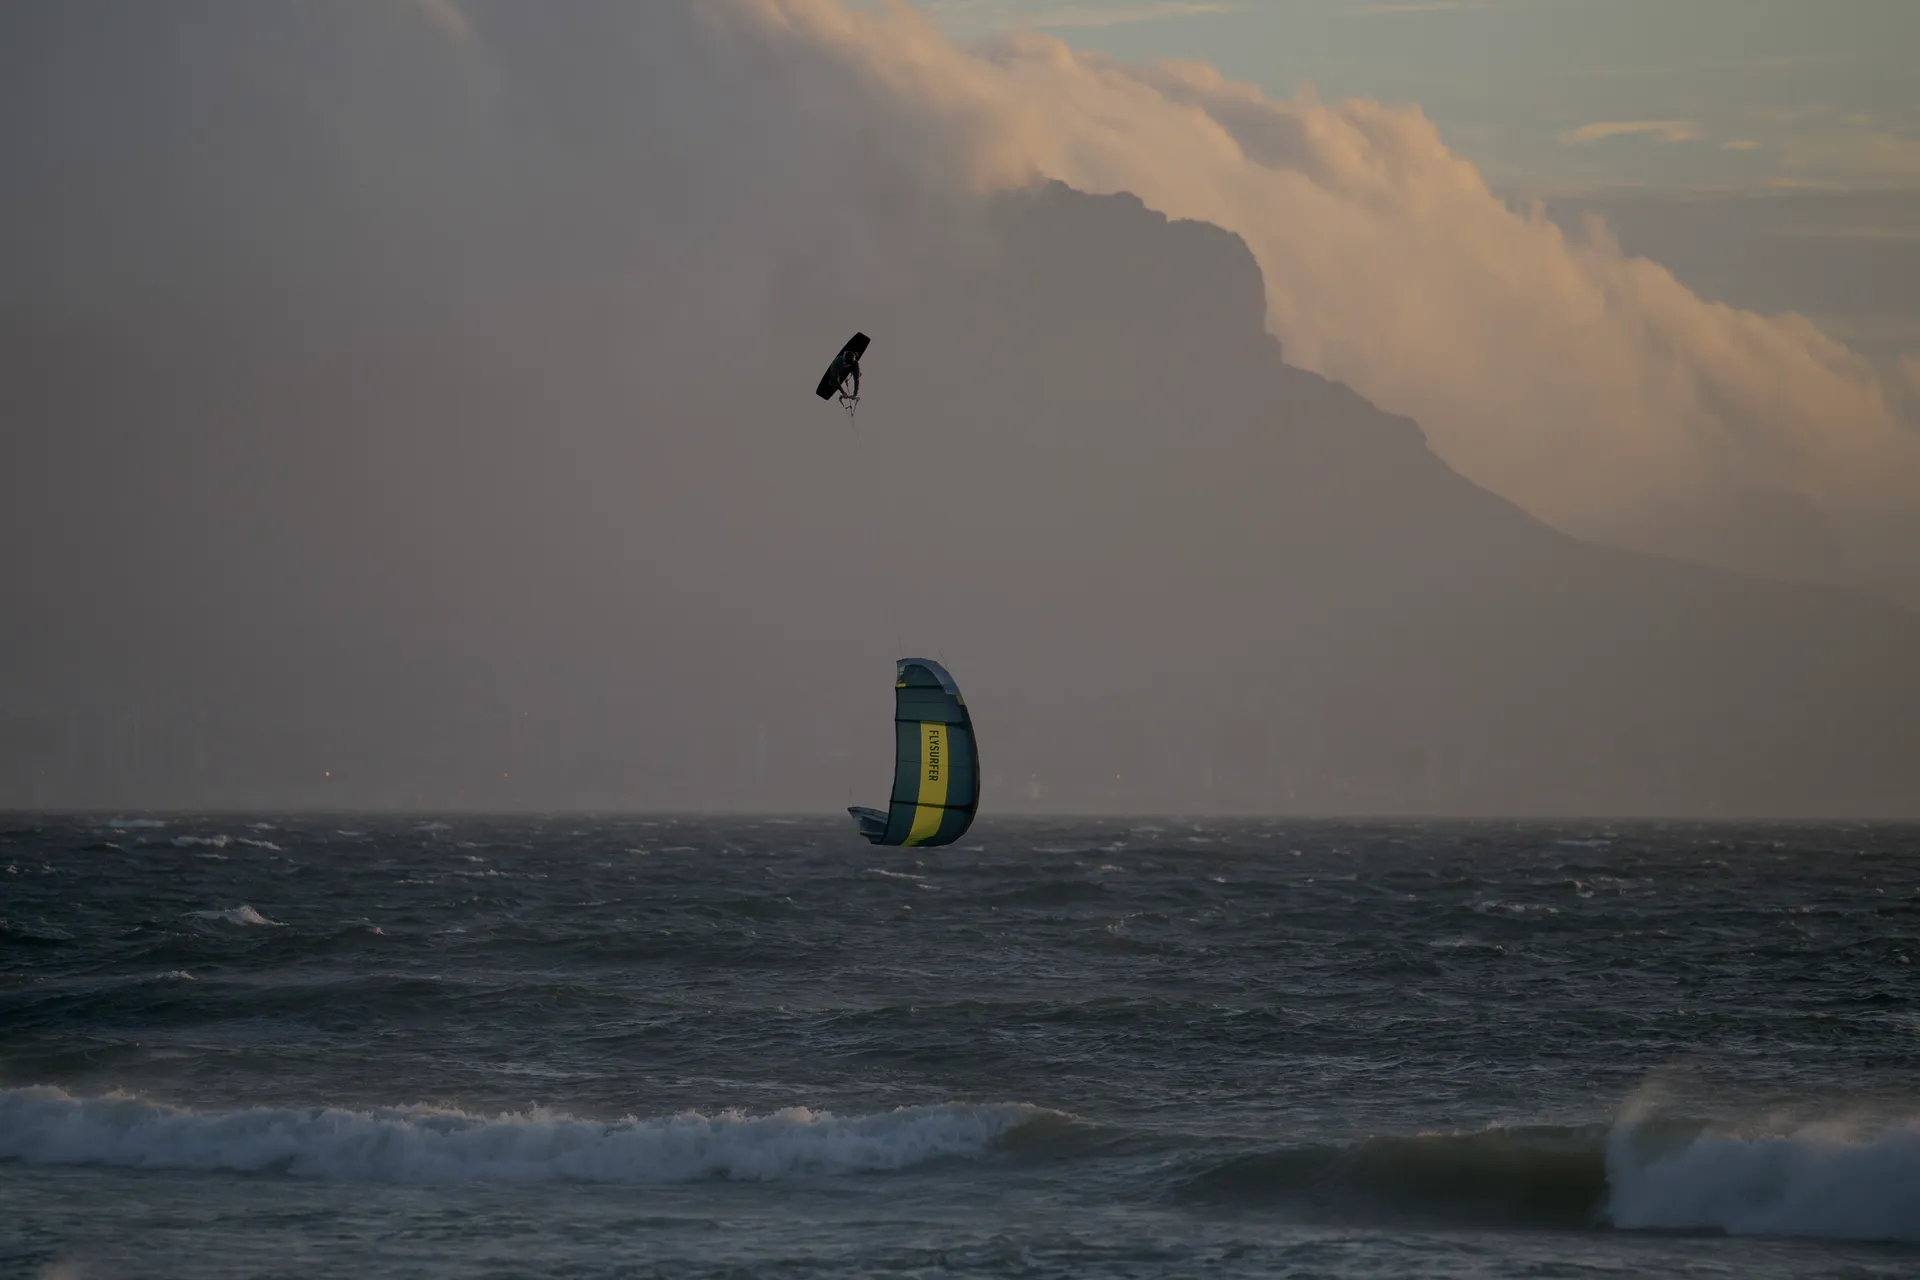
Big Air is the kitesurfing discipline focused on height, hangtime, power and aerial control. It is the style you see in Cape Town, Tarifa, Leucate, storm sessions and major events where riders send huge boosts, board-offs, rotations, kite loops and megaloops in strong wind.
At its core, Big Air is not only about jumping high. It is about using the kite, board and wind together as efficiently as possible.
A proper Big Air jump combines:
- Speed before takeoff
- A strong edge against the kite
- Precise kite timing
- A clean pop from the water
- Body tension in the air
- Active kite control during descent
- A soft, controlled landing with board speed
The best jumps feel powerful but not chaotic. You should not feel like the kite randomly ripped you off the water. You should feel like you created lift, released at the right moment and stayed connected to the kite through the whole flight.
Why Most Riders Do Not Jump as High as They Could
Most intermediate riders think height comes from sending the kite harder. That is only partly true.
A kite can only lift you properly if you give it something to work with. That “something” is stored energy from speed, edge tension and board pressure.
If you send the kite without enough speed, the jump feels weak.
If you ride fast but lose your edge, you get pulled downwind.
If you edge well but send the kite too late, you miss the lift.
If you jump high but redirect poorly, the landing gets heavy.
In Big Air, small timing mistakes become very visible. One second too early or too late can turn a smooth elevator-style boost into a low, sideways yank.
The main reasons riders struggle to jump higher are:
- Not enough board speed
- Weak edge before takeoff
- Sending the kite too slowly
- Sending the kite too far past 12
- Pulling the bar too early
- Leaving the water before the kite creates lift
- Looking down instead of committing upward
- Not redirecting the kite for landing
- Landing too vertically with no forward speed
- Trying advanced Big Air moves before the basic jump is consistent
If you fix these, your jumps improve quickly.
The Foundation: You Should Not Learn Big Air Before This Is Solid
Before chasing bigger jumps, you should already be comfortable with:
- Riding upwind in both directions
- Controlling speed with edge pressure
- Relaunching your kite confidently
- Using your safety system
- Riding powered without panicking
- Jumping small and landing under control
- Understanding right of way
- Keeping distance from riders, beach, obstacles and shallow water
Big Air is not a beginner skill. Even a “small” mistake becomes more serious when you add height, speed and stronger wind.
A simple rule:
If you cannot land ten medium jumps cleanly in a row, you are not ready to chase maximum height.
That does not mean you should not practice jumping. It means your first goal should be consistency, not numbers.
The Perfect Big Air Conditions
Good Big Air conditions are not just “strong wind”. Strong wind helps, but the quality of the wind and water matters just as much.
Wind
The best wind for progression is:
- Strong enough to create lift
- Consistent enough to trust
- Not violently gusty
- Side-shore or side-onshore
- With enough space downwind
For most riders, progression is safer in controlled strong wind than in unpredictable gusty wind. Gusts can create height, but they also make timing harder and landings more dangerous.
Water
Ideal water depends on your level.
For learning jumps:
- Flat water or small chop helps
- You can hold your edge more easily
- Takeoff timing is cleaner
For advanced Big Air:
- Kickers and waves can add height
- Chop can help launch if timed well
- Mistimed chop can destroy your edge
If you are still learning, do not rely on kickers. Learn to jump from your edge first.
Space
You need more space than you think.
Before every Big Air attempt, check:
- Downwind area
- Other riders
- Swimmers
- Obstacles
- Beach distance
- Shallow water
- Launch and landing zone
- Wind direction changes
A good jump starts before the takeoff. If the landing zone is not clear, do not send it.
Gear Setup for Big Air
You do not need competition-level gear to jump higher, but your setup matters.
Kite
For Big Air, riders often use kites with:
- Strong lift
- Good hangtime
- Fast steering
- Reliable control in strong wind
- Good depower range
- Stable behavior during loops and redirects
A beginner-friendly freeride kite can still jump well. A dedicated Big Air kite may give more lift and hangtime, but it also demands better control in strong wind.
Board
A twin tip is the standard Big Air board.
For jumping higher, a board should help you:
- Hold a strong edge
- Build speed
- Release cleanly
- Absorb landings
- Maintain control in chop
A board that is too big may feel harder to hold down in strong wind. A board that is too small may struggle in lighter wind or make landings less forgiving. The right size depends on your weight, wind range and riding style.
Harness
A comfortable, supportive harness matters more than people think. Big Air puts serious load through your body. If your harness rides up, twists or restricts movement, your takeoff and landing suffer.
Safety system
Before riding powered, check:
- Quick release
- Leash attachment
- Chicken loop
- Lines
- Bar movement
- Depower trim
- Pigtails and bridles
- Kite canopy condition
Big Air progression should never happen with questionable gear.
The Big Air Jump: Step by Step
A strong jump has four phases:
- Approach
- Load and send
- Takeoff
- Flight and landing
Each phase matters.
Phase 1: The Approach
The approach creates the energy for the jump.
You want to ride with:
- Good speed
- Controlled power
- Kite around 10:30 to 11 or 1:30 to 1 depending on direction
- Board edging upwind
- Body low and engaged
- Eyes looking ahead
- Landing zone already checked
A common mistake is riding too slowly because the wind feels strong. But speed is part of lift. Without speed, you cannot load the edge properly.
Think of the approach as building tension between your board and kite. The kite wants to pull you downwind. Your board edge resists. That resistance becomes pop.
No edge, no boost.
Phase 2: Loading the Edge
Loading the edge is where most height is created.
You need to:
- Increase edge pressure
- Push through your back leg
- Keep the board driving upwind
- Keep your upper body controlled
- Resist the kite instead of following it
- Avoid flattening the board too early
The stronger your edge, the more energy you can release into the jump.
But loading does not mean stopping. If you edge so hard that you kill your speed, you lose power. The best riders hold an edge while still moving fast.
The feeling should be:
Fast, loaded, controlled.
Not slow, stiff and overpowered.
Phase 3: Sending the Kite
To jump, the kite needs to move quickly upward through the wind window.
If you are riding left foot forward, you usually send the kite from around 11 toward 12 and slightly past it.
If you are riding right foot forward, you usually send it from around 1 toward 12 and slightly past it.
The kite movement should be decisive but not panicked.
Too slow:
- The kite does not generate enough lift
- You get a small floaty jump
Too aggressive:
- You may get ripped off your edge
- You may lose board control
- You may pendulum too far under the kite
Too far back:
- You stall in the air
- You land with no forward speed
- You may fall backward or drop vertically
The goal is not simply to throw the kite behind you. The goal is to move it through the power zone of lift while your edge is still loaded.
Phase 4: Takeoff and Pop
Takeoff happens when the kite lift and board release meet.
The sequence is:
- Ride fast
- Load your edge
- Send the kite
- Feel the lift building
- Pop from the water
- Pull the bar in as you leave the water
Do not pull the bar in too early. If you sheet in before the kite is lifting, you may choke the kite or lose edge control.
A clean pop is not a huge wakeboard-style explosion. It is a committed release. Push through the board, extend your legs and let the kite lift you.
The best takeoffs feel like the water disappears under your feet.
Body Position in the Air
Once you are airborne, your job is to stay balanced under the kite.
Good body position:
- Knees slightly bent
- Core engaged
- Board under you
- Bar controlled
- Shoulders relaxed
- Eyes looking toward landing
- Kite not forgotten above you
Avoid:
- Letting your legs dangle
- Pulling one side of the bar accidentally
- Looking straight down
- Stiffening completely
- Throwing your body backward
- Bringing the kite too far behind you
The higher you go, the calmer you need to become. Panic steering is one of the fastest ways to turn a good jump into a heavy landing.
How to Land Big Air Jumps Safely
Landing is not something you deal with at the end. You prepare it during the whole jump.
A safe landing needs:
- Kite redirected forward
- Board pointed slightly downwind
- Knees ready to absorb impact
- Some forward speed
- Eyes on the landing zone
- Bar control
The most common mistake is landing too vertically. If you fall straight down with no forward pull from the kite, the impact is heavy. Your knees, back and board take the hit.
A better landing has forward movement. You want the kite to pull you slightly forward as you touch down.
The basic landing sequence
- At the top of the jump, stay calm
- As you start descending, redirect the kite forward
- Point the board slightly downwind
- Keep the bar controlled
- Land tail first or flat with soft knees
- Ride away with speed
- Regain edge after landing
Do not try to land with the board fully across the wind. That creates too much resistance and can throw you over the front.
Think:
Downwind first, edge later.
Why Heli Loops and Downloops Matter for Bigger Jumps
Once your jumps get higher, a simple redirect may not always be enough to soften the landing. That is where heli loops and downloops become important.
A heli loop is a controlled loop of the kite above you, usually used to create lift and forward pull during descent. It is not the same as an aggressive low megaloop. It is a landing tool.
A properly timed heli loop can:
- Slow your descent
- Create forward momentum
- Prevent a vertical drop
- Help you land softer
- Keep the kite flying actively
But it must be learned progressively. Do not try heli loops for the first time on your biggest jump of the day.
Start small:
- Practice loops in lighter wind
- Learn the kite movement
- Understand pull direction
- Try it after medium jumps
- Build confidence before using it high
If you are scared of looping the kite, work with an instructor or experienced rider. A loop done too late, too low or too aggressively can create more problems than it solves.
How to Jump Higher: The Real Progression Formula
If you want more height, improve these five areas.
1. More controlled speed
Speed creates apparent wind and lift. But it must be controlled speed. Riding fast while flat on the board does not help if you cannot edge.
Work on riding faster while still holding direction.
2. A stronger edge
Your edge is your launch platform. The better you can resist the kite, the more power you store before release.
Practice:
- Riding powered without losing control
- Driving upwind
- Loading progressively
- Keeping pressure through the back leg
3. Better kite timing
Most riders send too early, too late or too slowly.
A good drill:
- Do medium jumps and focus only on kite timing
- Forget height for a session
- Try to make every takeoff clean
- Land with speed every time
4. Cleaner pop
You need to release from the water with intent. If you just let the kite lift you, the jump often feels weak and uncontrolled.
Pop when the kite starts lifting, not after you are already being ripped off the water.
5. Better landing preparation
You can only commit to height if you trust your landing. The more consistent your landings become, the more confidently you can send.
Progression is not just “jump higher”. It is “land better so you can safely jump higher again”.
Common Big Air Mistakes
Sending the kite without edging
This creates a downwind yank instead of vertical lift. You may still leave the water, but it will not be a clean boost.
Pulling the bar too early
Sheeting in too early can reduce kite speed and weaken lift. Wait until the kite is lifting and you are releasing.
Killing speed before takeoff
A strong edge is good. A dead stop is not. You need speed and resistance together.
Looking down
Looking down often makes your body collapse. Look where you want to go, especially during landing.
Forgetting the kite in the air
The kite is not finished after takeoff. You must manage it through the jump.
Landing across the wind
Point slightly downwind first. Then regain your edge.
Chasing numbers too early
WOO scores, Surfr stats and social media clips can be motivating, but they can also push riders into bad decisions. Your best jump is not worth much if you cannot ride away from it.
Big Air Safety: The Rules That Keep You Riding
Big Air has consequences. Respect that.
Keep distance
Give yourself more downwind space than you think you need. A gust, mistake or redirect delay can carry you far.
Avoid shallow water
Landing hard in shallow water is dangerous. Bigger jumps need deeper water.
Do not jump near the beach
Many serious accidents happen close to shore. If you want to jump big, go out.
Check your gear
Strong wind exposes weak gear. A worn line, sticky quick release or damaged bridle is not a small issue.
Know when not to ride
If the wind is too offshore, too gusty, too crowded or too unpredictable, Big Air can wait.
Build gradually
Do not jump from 5-meter jumps to megaloop conditions. Progression should be layered.
The Mental Side of Big Air
Big Air is physical, but it is also mental. You need commitment at takeoff and calmness in the air.
Too little commitment:
- Weak edge
- Late pop
- Low jump
- Awkward landing
Too much aggression:
- Over-sent kite
- Lost control
- Hard crash
The best mindset is controlled commitment.
Before a jump, ask yourself:
- Is the landing zone clear?
- Is the kite powered but manageable?
- Am I in control of my edge?
- Do I know how I will land?
- Am I sending because conditions are right, or because I feel pressured?
Do not let other riders, cameras or jump scores choose for you.
Training Drills to Jump Higher
Drill 1: Ten clean medium jumps
Do ten jumps where the only goal is landing smoothly with forward speed.
No tricks. No maximum send. Just clean takeoff and landing.
If you cannot land ten clean medium jumps, stay here.
Drill 2: Edge and release timing
Ride powered, load your edge, send the kite and focus on popping at the exact moment lift begins.
Do not chase height. Chase timing.
Drill 3: Landing direction
On every jump, consciously point the board slightly downwind before landing.
This builds safer habits for higher jumps.
Drill 4: Kite redirect awareness
Pay attention to when you redirect. Too early and you lose hangtime. Too late and you drop.
Try to feel how the kite catches you.
Drill 5: Small heli loop progression
Only once your basic landings are strong, practice gentle loops on smaller jumps.
Start in safer wind, with space, and build slowly.
How Big Air Progression Looks Over Time
A realistic progression path could look like this:
Stage 1: Controlled small jumps
You can jump, keep the kite above you and land without crashing.
Stage 2: Medium jumps with clean landings
You begin to build height but still prioritize riding away.
Stage 3: Higher boosts
You add more speed, stronger edge and better timing.
Stage 4: Board control and grabs
You stay calm enough in the air to add style.
Stage 5: Heli loops for landing
You use kite movement to manage descent.
Stage 6: Rotations and advanced control
You add front rolls, back rolls or board-offs.
Stage 7: Kite loops and Big Air tricks
Only after strong fundamentals, you start exploring loops, downloops and more technical Big Air moves.
Skipping stages usually leads to crashes.
Big Air Gear Choices: What Really Matters
Gear helps, but it does not replace technique.
A dedicated Big Air setup can make a difference once your fundamentals are strong. But if your edge, timing and landing are weak, a more powerful kite may simply make your mistakes bigger.
Prioritize:
- Correct kite size for the wind
- A board you can edge hard
- A comfortable harness
- A bar with clean safety and steering
- Reliable lines and bridles
- Proper trim
Do not ride overpowered just because you want more height. Being slightly overpowered may help advanced riders, but being dangerously overpowered reduces control.
How to Read Your Jump Data Without Letting It Control You
Jump tracking apps and devices have changed Big Air culture. Riders now compare height, hangtime, sessions and records. That can be fun and motivating.
But numbers only tell part of the story.
A good session is not just:
- biggest height
- highest score
- longest hangtime
It is also:
- clean landings
- good decisions
- no close calls
- progression without injury
- consistency
Use jump data as feedback, not pressure.
A 10-meter jump landed cleanly is better progression than a 14-meter jump you barely survive.