
Control bar
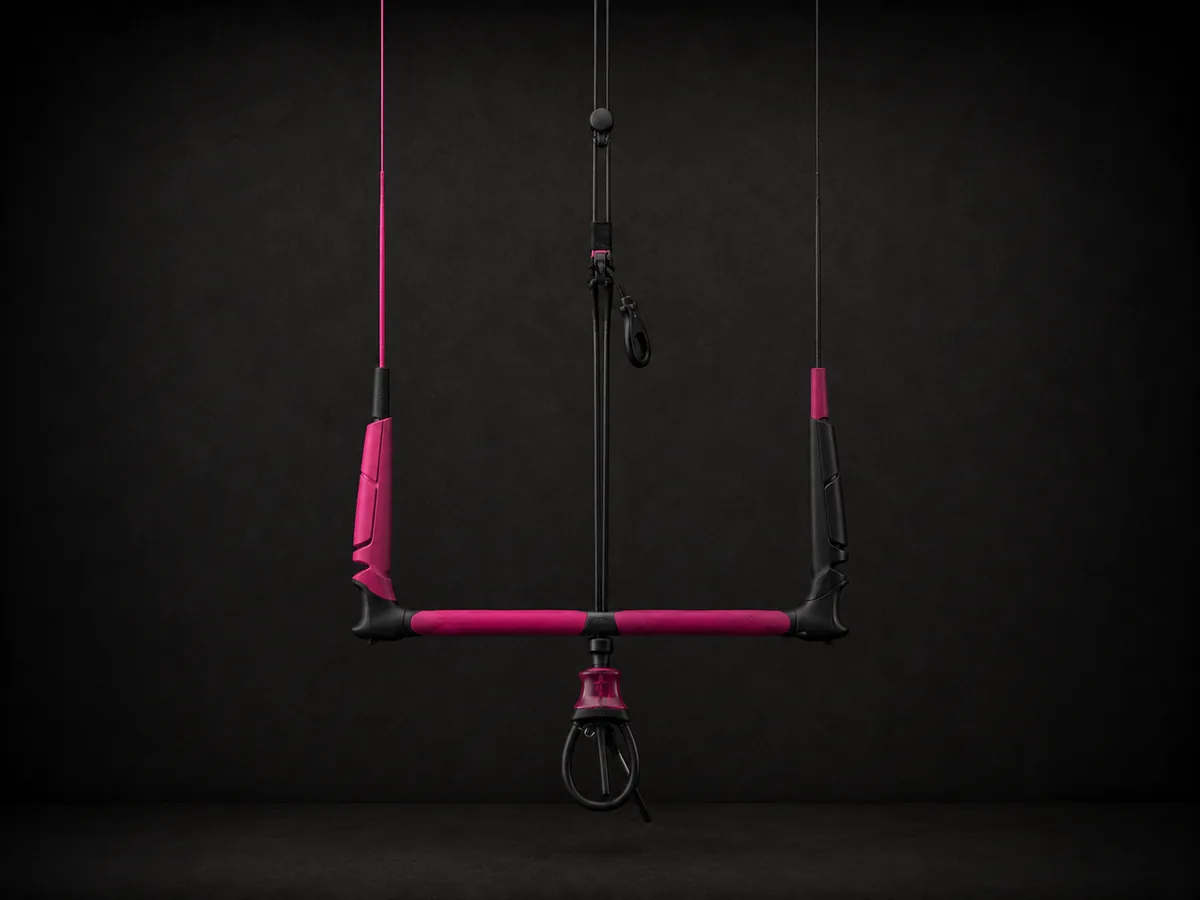
The handle you steer with and the main grip point. Bar width is matched to kite size: narrower for smaller kites, wider for bigger ones. Check the grip for cracks and that it isn't slippery.
6 chapters
The bar is your steering, power and safety system in one. It does far more than turn the kite: it controls power, trims the kite and fires the safety release when you need it. The right bar is the one that matches your kite, rider and safety system correctly.
01 / 06
The bar steers the kite, sheets power in and out and depowers through the trim. Most importantly, it releases you from the kite through the quick release and flags the kite out through the safety line. Every one of those jobs has to work when you need it, often in a second.
That's why bar compatibility isn't a performance detail. An incompatible or worn bar may not depower the kite fully or let it flag out as designed. Old lines stretch, safety lines wear, and quick releases seize if they're neglected. Beginners shouldn't guess compatibility, and no one should ride a safety system they can't verify. The best bar is the one that fits your kite, your weight and the safety system correctly, whatever its price or looks.
02 / 06
The handle you steer with and the main grip point. Bar width is matched to kite size: narrower for smaller kites, wider for bigger ones. Check the grip for cracks and that it isn't slippery.
Carry most of the kite's pull and run from the chicken loop to the kite. They take the load, so they need to be equal length and free of wear.
Connect to the bar ends and steer the kite by changing each wingtip's angle. Uneven length or stretch changes how the kite turns and trims.
The loop that locks you into the bar through your harness hook or spreader bar. Check that it and the stopper aren't deformed or worn.
A push-away release built into the chicken loop that detaches you from the kite under load. It is your primary safety system. Test it for smooth operation before every session.
A cleat, strap or click system that reduces the kite's power without changing kites, by shortening the front lines relative to the back. Check the rope or strap for glazing and wear.
After a release, the kite stays attached on a single line and flags out, spilling its power. The line can run inside or outside the throw line; the external part wears faster, so inspect it.
The ends hold the steering lines and the floats keep the bar visible on the water. Check that line stoppers and floats are intact.
The short knotted leaders that connect bar lines to the kite. Orientation and knots matter for the right setup, and frayed or wrongly tied pigtails are a problem.
Keeps you attached to the kite after you fire the quick release, so the kite doesn't blow away. Check the leash, its hook and the attachment point.
03 / 06
Where the front lines split
Steering feel
Safety system
Cross-brand fit
Trim when switching
Where you'll see it
| Feature | Low V | High V (high Y) |
|---|---|---|
| Where the front lines split | Low, close to the bar | Higher up, a Y/V above the bar |
| Steering feel | More direct, less lag | Can feel more pivoty with a matching bridle |
| Safety system | Often allows a single-front-line flag-out | Depends on the design, so check the manufacturer |
| Cross-brand fit | Generally more flexible | More tied to the matching kite and bridle |
| Trim when switching | May need a touch more power | May need a touch of depower |
| Where you'll see it | Common on many current bars | Used by specific kites and bridles |
High V and low V describe where the single front line splits into two above the bar. They affect steering feel and, more importantly, which safety system the bar works with. Don't mix bar and kite V setups at random. Match the system the kite is designed for, and ask the manufacturer or a trusted shop if you're unsure.
Line length feel
Common lengths
Bar width
Turning
Who tends to use it
| Setting | Shorter / narrower | Longer / wider |
|---|---|---|
| Line length feel | More direct, faster response, smaller window | More power and a slower, smoother feel |
| Common lengths | ~19–20 m | ~22–24 m (sometimes 27 m), often with extensions |
| Bar width | Narrower bar for smaller kites | Wider bar for bigger kites |
| Turning | Faster steering | More leverage, slower turn |
| Who tends to use it | Stronger wind, fast handling | Lighter wind, bigger kites |
Numbers vary by system, so treat these only as cautious examples. Many brands ship one or two bar widths and line lengths designed for a kite's size range, and some use a single bar across most sizes. Extensions let you tune length within a system. Use the setup designed for the kite unless you know exactly what you're changing and why.
04 / 06
Not every bar works safely with every kite. Brand, model year, line length, safety system and the high-V vs low-V setup all matter. The safest starting point is the bar that ships with your kite, or a current bar from the same brand designed for it. If you're unsure, ask the manufacturer or a trusted shop before mixing components. The question is whether your safety release works when you need it.
Compatibility decides whether the kite depowers and flags out as intended. If you're mixing anything, confirm it with the manufacturer or a trusted shop first.
Most kite brands design their bars around their own kites and safety systems. You'll commonly see control systems from Duotone, North, Core, Cabrinha, Slingshot, Naish, Ozone, F-One, Reedin, Eleveight, Airush and Flysurfer, among others. They differ in their high V or low V setup, quick release design, line setup and connector details, so a bar that works on one brand's kite may not flag out correctly on another's.
Choose a bar by compatibility, condition, safety system and support, and ignore the brand hype. If you want to run a bar with a kite it didn't ship with, confirm it with the manufacturer or a trusted shop first. This is about whether the kite depowers and flags out as intended.
05 / 06
Safety clarity
Ease of use
Depower range
Compatibility
Line condition
Bar width / line options
Tuning
Best user
| Feature | Beginner-friendly bar | Performance bar |
|---|---|---|
| Safety clarity | Simple, obvious quick release | Same safety, plus tuning options |
| Ease of use | Few settings, easy to learn | More adjustment to learn |
| Depower range | Generous and forgiving | Tuned to the discipline |
| Compatibility | Matched kite-and-bar set | Rider knows the system |
| Line condition | Fresh, known history | Inspected and maintained |
| Bar width / line options | One matched setup | Width and line-length choices |
| Tuning | Set and ride | Bar pressure, loop size, slider |
| Best user | New and progressing riders | Riders who know their system |
Beginners should prioritise a current safety system, good condition, simple use and a matched kite-and-bar setup. Advanced riders may care about bar pressure, line length, loop size, slider compatibility and freestyle or Big Air preferences. The safety system and compatibility still come first for everyone.
Beyond safety, the bar shapes how the kite feels. Bar pressure tells you where the kite is without looking. Lighter pressure feels effortless, more pressure gives stronger feedback. Steering speed, how quickly you can reach the trim, and line length all change the feel through turns, jumps and waves.
None of that comes before safety and compatibility. A bar that feels great but doesn't match your kite's safety system is the wrong bar. Get the system and condition right first, then fine-tune the feel.
06 / 06
A new bar gives you a known safety system, fresh lines and a setup matched to your kite. A used bar can save money, but only if you can verify its history and condition. The lines, quick release and safety line are exactly the parts that age.
Visual inspection isn't always enough. Lines stretch and lose strength before they look worn, and an internal flag-out line can hide damage. If you can't verify the condition, plan to replace the lines and safety-critical parts, or don't buy it. The bar is your safety system, so this is not the place to save money.
A bar lasts longer and stays safer with a simple routine. Keep it high-level: inspect, test and replace, and leave safety-critical work to the manufacturer or a trusted shop.
Pairing a random bar with a kite from another brand without checking
Ignoring high V vs low V and the bridle the kite expects
Buying an old bar with unknown safety history
Never test-firing the quick release before a session
Ignoring uneven line stretch or a length mismatch
Riding with a glazed or frayed depower rope
Mixing pigtails or connectors incorrectly
Assuming the same line length suits every kite
Choosing a bar by price alone
Going out without checking the safety line and leash
FAQ
Not safely as a rule. Bridle geometry, the high V or low V setup, line length, the safety throw and the front-line setup all vary between brands and even model years. A mismatched bar may not depower the kite or let it flag out as designed. Ride the bar made for your kite, and if you want to run a different one, confirm it with the manufacturer or a trusted shop first.
The mechanism that disconnects you from the kite under load, usually a push-away release built into the chicken loop. Push it and the chicken loop detaches from your harness spreader bar. It's your primary safety system, so test it for smooth operation before every session and keep it clean.
After you fire the quick release, the kite stays attached to you by a leash on a single line, called the safety or flag-out line. Letting the kite hang on one line spills the power so it flags out and stops pulling. The line can run inside or outside the throw line; the external part wears faster, so inspect it regularly.
It's where the single front line splits into two above the bar. Low V splits close to the bar and often feels more direct; high V (high Y) splits higher up and can feel more pivoty with a matching bridle. Low V setups frequently allow a single-front-line flag-out and tend to be more cross-brand friendly, but you should still match the system the kite is designed for.
Inspect them every session and replace them when you see fuzz, fraying, exposed core fibres or a length mismatch between equivalent lines. Hard-charging riders often replace lines yearly; lighter weekend use can stretch to a couple of seasons. Stretched or uneven lines change how the kite flies and depowers.
Only if you can verify the condition. Check the lines for wear and equal length, the depower rope for glazing, the quick release for smooth operation and the safety line for damage. If the history is unknown or anything looks tired, replace the lines and safety parts or don't buy it. Safety-critical gear is the wrong place to save money.
Because the bar steers the kite and is also your safety system. An incompatible bar may not depower the kite fully, may not flag it out correctly, or may load the lines unevenly. Each of those is a safety problem, which is why you confirm any non-matching combination with the manufacturer or a trusted shop.
A current safety system, good line and quick-release condition, simple operation and a bar that's matched to the kite. Don't guess compatibility, don't buy an old bar with unknown history, and learn to test the quick release and check the safety line as part of every session. A school or shop can show you how.
Safety release, depower and line setup, scored the same way for every brand.